
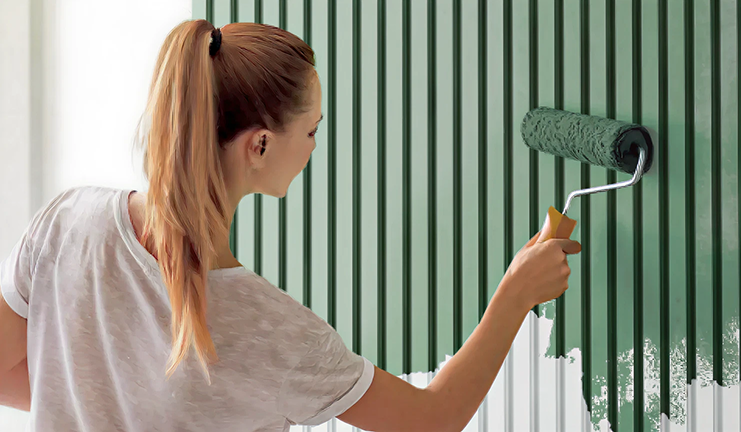
⏱️ Reading time: 3 min
Three-dimensional wall decorations are a proven way to add depth, elegance, and a modern character to an interior. By choosing factory-finished mouldings, you gain complete design freedom – you can perfectly match their shade to the wall color or create a striking architectural accent.

For the finish to impress with its aesthetics and durability, it is crucial to carry out the entire process correctly: from installation, through jointing, to coating the surface with paint. Here is a complete guide on how to prepare and paint wall panels step by step.
Choosing the right panels and preparing the substrate
The success of the wall finish depends on the quality of the material and proper surface preparation. When choosing three-dimensional decorations, it is worth opting for durability and resistance to mechanical damage. Products made of high-density polystyrene (HDPS) are an excellent choice. The collection featuring elegant Thalia wall panels for painting has a factory matte primer that makes applying water-based paints easier.
Preparatory work should start with the substrate:
Cleaning the wall: The surface must be free from dust, completely dry, and degreased.
Leveling and priming: Fill any imperfections with filler and prime absorbent plaster to ensure optimal adhesion.
Material acclimatization: Leave the panels in the room for at least 24 hours before installation so they can adapt to the ambient temperature and humidity.

🛒 Recommended products from this category:
Check out our dedicated collection: Wall panels and choose the perfect solution for your interior.
Installation and jointing – how to achieve a uniform surface?
Precise installation is the foundation of a smooth 3D wall without visible joints. For permanently mounting elements made of synthetic materials, use only dedicated chemical adhesives.
Applying the adhesive: Apply moulding adhesive in strips or with a wavy motion directly to the back of the panel.
Pressing against the wall: Glue the profile to the substrate and press firmly along its entire length.
Filling the joints: Once the adhesive has dried, fill the gaps at the joints by precisely applying moulding filler.
Sanding and dusting: Once the filler has dried, sand the joints with fine-grit sandpaper (e.g., P220–P240), then thoroughly dust the entire surface.

What to use and how to paint 3D wall panels?
Panels made of expanded synthetic materials and coated with a factory primer can be painted with most popular water-based interior paints.
What paint will be best?
Acrylic, latex, and vinyl paints: They provide excellent coverage, flexibility, and wash resistance.
Avoid solvents: Absolutely avoid solvent-based paints and aggressive sprays, as they can damage the structure of the material.
Painting technique
For efficient work, prepare a complete set of tools, using a practical interior painting set. For cutting and trimming the material, a stable wooden work stand will come in handy.
Brush or roller: Cover the corners of the 3D pattern with a soft-bristle brush, and flat sections with a velvet roller.
Spray painting: Provides the most uniform coating without drips in the recesses of deep structures.
Number of coats: Usually, applying two thin coats of paint gives the optimal visual effect.
💡 Read also:
What are the current fashionable skirting boards? A guide to trends and interior finishingMost common mistakes when preparing and painting panels
Failure to dust after sanding: Leftover dust weakens paint adhesion and creates unsightly lumps.
Use of solvent-based paints: Leads to permanent damage to the decoration.
Too thick a coat of paint: Causes drips to form in the recesses of the 3D profile.
Skipping acclimatization: Can result in microcracks in the joints due to temperature changes.

Summary – checklist for perfect installation and painting
[x] Clean, dry, and prime the wall
[x] Acclimatize the panels in the room for at least 24h
[x] Install the panels using the correct adhesive with firm pressure
[x] Fill the joints with filler and sand carefully
[x] Thoroughly dust the wall surface before painting
[x] Apply 2 coats of acrylic or latex paint
Frequently Asked Questions (FAQ)
Do 3D wall panels need priming before painting?
If you choose panels with a factory primer coating (e.g., marked LM), priming the entire panels is not necessary. It is enough to finish the jointed areas with filler.
Can regular wall paint be used to paint 3D panels?
Yes, standard water-based interior paints – acrylic, latex, and vinyl – will work well.
How many coats of paint should be applied to the panels?
It is recommended to apply 2 thin coats, which allows for perfect coverage and full color saturation.
What tools are needed for processing and installing wall panels?
For precise cutting, a fine-tooth saw or miter saw, a glue scraper, a putty knife, fine-grit sandpaper, and a stable work stand will be useful.
Where to find high-quality three-dimensional wall decorations?
If you are looking for modern solutions for interior finishing, check out the rich offer featuring durable and easy-to-install 3D wall panels.
Share:
#11 Modern window styling and interior decor x AKADEMIA CEZAR
Cashmere, sage and earthy tones – how to match skirting boards from the EARTH Line series to trendy walls? A step-by-step guide